No products
Product successfully added to your shopping cart
There are 0 items in your cart. There is 1 item in your cart.
Micro Balances
- Closed Loop Extractors
- Turn Key Extractor Systems
- Extractor Parts & Accessories
- Lab Equipment
- Vacuum Pumps
- Recovery Pumps
- Solvent Tanks
- Carbon Chemistry
- Terpenes
- Dry Ice
- Safety Equipment
 View larger
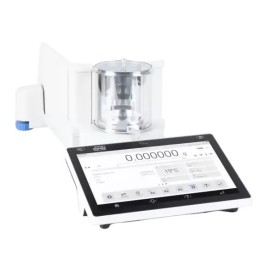
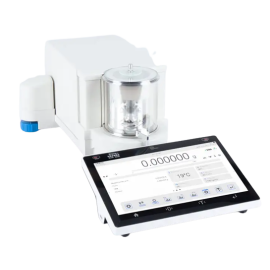
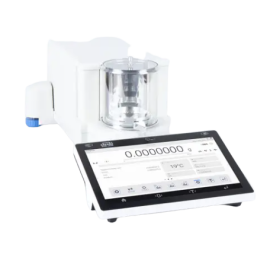
Radwag 5.1g Capacity 1µg Readability Ø1" MicroBalance
New
More info
AUTOTEST: Diagnostic function aiming at metrological parameters determination (repeatability), the parameters are determined for the actual conditions of use. When speaking of repeatability it may be also used for weighing time optimization. Autotest is operated in an automatic mode thus operators time is saved.
DOSING: Weighing process for which reference mass has been determined together with tolerance for its determination. Dosing tolerance is given in [%] and it is calculated in relation to the reference value thus being a permissible deviation of this process. This solution is used for weighing powders, liquids and loose materials. Dosing function performance is often supported with bargraph - load indicator. For industrial scales it is possible to use a control systems of dosing process.
PERCENT WEIGHING: Percent Weighing function is used for comparision of measured products with mass standard. Mass of a mass standard may be a numeric value taken from a database or it may be determined through a measurement process. Each measured product is compared to mass standard, mass of which is presumed as a model 100% ideal mass. For products weighing less than the mass standard, obtained results are lower than 100%, for products weighing more, the obtained results are greatly exceeded.
PARTS COUNTING: Function using mass measurement for determination of measured items quantity. Mass of a single item is required for this process. It may be either estimated through weighment or taken from a database. For items counting the following algorithm is used: all items mass / single item mass = quantity. Function operation is supperted by a mechanism of Automatic Correction of Accuracy. This allows to update single item mass in course of the process. To a certain extend Automatic Correction of Accuracy eliminates error which may be a result of different mass values of seemingly alike single elements. For industry solutions items counting may be simultaneously carried out with checkweighing and dosing thus industry solutions feature audio signalling base informing that specified number of items has been weighed. It is possible to apply weighing systems using few platfroms of different MAX capacities and different accuracies.
FORMULATION: Function supporting the mixture making process, wherein the mixture contains various components. Formulation function usually uses the balance/scale database of components. Formulation serves for monitored checkweighing of every single component with a given tolerance. It is enriched with a set of individual settings.
STATISTICS: Statistiscs function registers and analyses performed measurements. This supplies the user withthe following information: Max and Min standard deviation, average value, variance, range et.
CHECKWEIGHING: Checkweighing function is used for checking whether the measured sample mass is within the predefined threshold values, Low [LO] and Hgh [HI]. The thresholds are given in [g] and [kg] units. Current state of a sample being measured is signalled by means of pictorgams located on a display for laboratory balances, for industrial scales Stackligt System is used. This visual +/- inspection is in operation during segregation, control or packing process of products for which mass has bees determined with a specifaied tolerance, eg. 12860 g 961.
IR SENSORS: Programmable function supporting the weighing process through control of the following options: sliding weighing chamber doors, printout, zeroing, tarring etc. Especially appreciated wherever preventing the balance from soiling is important.
GLP PROCEDURES: Diagnostic function allowing to objectively document performed measurements. GLP procedures may be either presented in a short report form or extended one.
ANIMAL WEIGHING: Process of mass determination for a product which may unwillingly reposition within the weighing pan. Mass determination in such cases requires much longer period of time when compared to typical weighing process. It is the user who defines period of time needed for control of measured product mass. The user can thus optimize the function depending on the measured product characteristics.
AIR DENSITY CORRECTION: Function performing correction of mass measurement indication, wherein the air density is taken into account. It is used in balances with reading unit < 0,01 mg.
AUTOMATIC SLIDING DOOR: Automatic side panes opened via touch-free IR sensors.
DIFFERENTIAL WEIGHING: Differential weighing informs about mass variation a particular sample, wherein the said variation is a result of manufacturing processes. Differential weighing is often applied in product control process, for which reference product parameters have been specified in order to be used as a source of comparison for the whole series. Insuchcasestandard deviation is the information which tells about quality and completeness of a final product. For systems based on a feed-back technique such information may be used by control units.
STATISTICAL QUALITY CONTROL: Statistical control for determination of basic statistical criteria: maximum, minimum, standard deviation, mean values for each batch, etc.
ALIBI MEMORY: "ALIBI" memory enables saving and storing up to 100000 measurements. Measurements are saved automatically upon each pressing of the key. There is no need for any additional operations or changing settings. The following data related with the measurements is saved: measurement date; measurement time; result (mass); tare value; operator carrying out the measurement (logged in); product name. The software saves the measurement in a so called loop, i.e. when the measurement no. 100001 is saved, the measurement 1 gets automatically deleted from the memory. Measurements saved to balance memory cannot be deleted.
You can preview and print out the data saved to the ALIBI database.
ADDITIONAL MODULES
The 21 CFR Part 11 Compliance Module is a solution especially useful for those users who are obliged to conform to provisions of 21 CFR Part 11 and EU GMP Part 4, Annex 11 regulations. These two documents determine the rules for using electronic records and signatures.
Data protection is guaranteed by:
- Advanced password settings
- Control of logging correctness, various permission levels
- Data management access
- Backup
- Electronic signature
- Time-defined automatic logout
- Modification record to Audit Trail file
The module features "Audit Trail" which registers each data modification (date, start value, modified value, operator responsible for the modification). This enables tracking all activities and modifying them in the future if required. The Audit Trail Reader freeware allows users to acquire data from the weighing instrument and export it as files to pdf, xls, csv, html formats.
No customer reviews for the moment.


